How Did I Build The Vice
Any chance of a few pictures and a bit more detail as to how you made the vice. I’ve recently made a similar bench and I’ve got a cheapo quick release vice that I’m not that happy with and if I can replace it for £20, I’d be a happy man.Matthew Moore.
Thanks for asking Matthew. I will stress once again that this type of vice is in my experience is inferior to a decent quick release vice which we use every day in our production workshop. However it does work well enough, it’s cheap, easy to build and looks really great on a bench like this. First thing your going to need is a vice screw. I purchased mine from Axminster Tools & Machinery, the rest of the bits were scrap from our workshop. I can appreciate that if you don’t have any suitable scrap to hand you might want to budget a further £10 to £15 for the wood required.
I used the following sizes, all sizes shown are the finished timber size. As mentioned above I used material from the scrap bin, I have noted also a change based on “if I had to do it again”. For the runner and vice face choose a reasonably dense hardwood, ash, sapele, oak, maple, anything like that would work just fine.
Vice Face 600mm x 225mm x 38mm – If I did this again I would go for 600mm x 200mm x 45mm
Runner, Full width of bench + 300mm for setting x 45mm x 45mm – If I did it again it would be Full width x 70mm x 45mm
Various sections needed for boxing in the runner will be based on your bench and where you position the mortice.
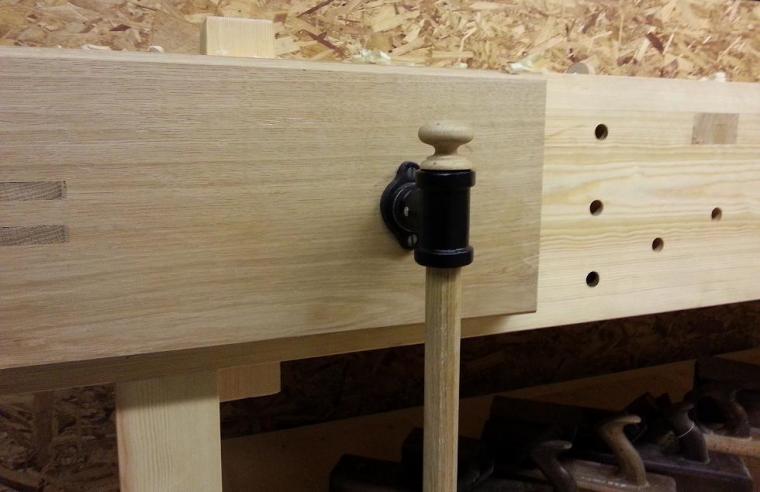
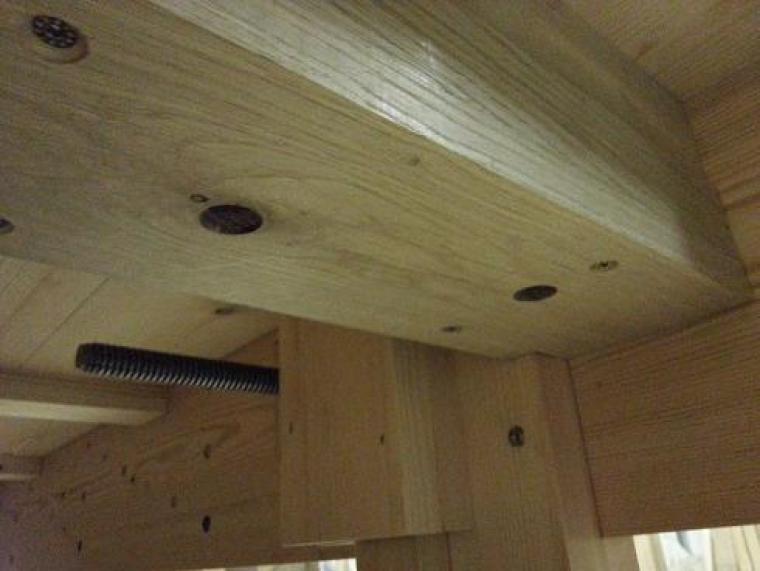
The reduction in face size and the increase of its thickness combined with a heavier runner would contribute to a more rigid vice. The next step for me was to cut a mortice into the apron for the runner, a bored out most of the waste with a brace and bit and finished up the edges with a chisel, making sure the runner ran smoothly through the mortice. I then bored a hole for the metal screw on the same centre line as the runner. The space between the runner and screw should be not more than 300mm. I went for 280mm, and if truth be told I would go for closer to 250mm if I did it again. You will most likely need to add a packer to the back of the apron to allow the vice nut to be fitted.
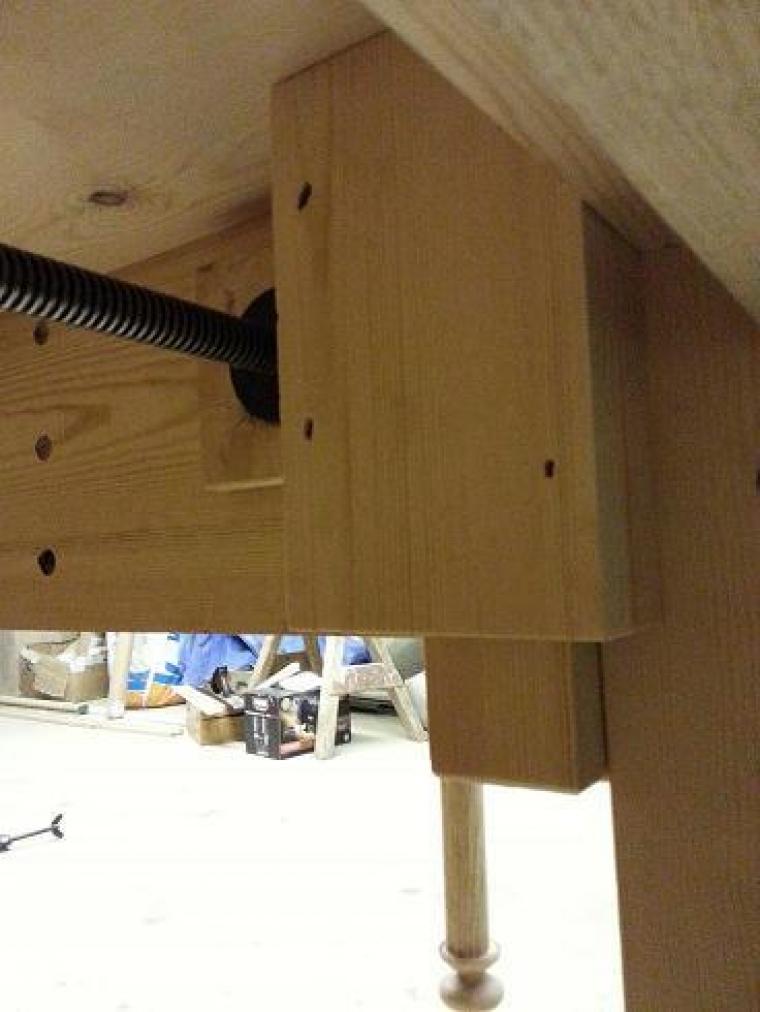

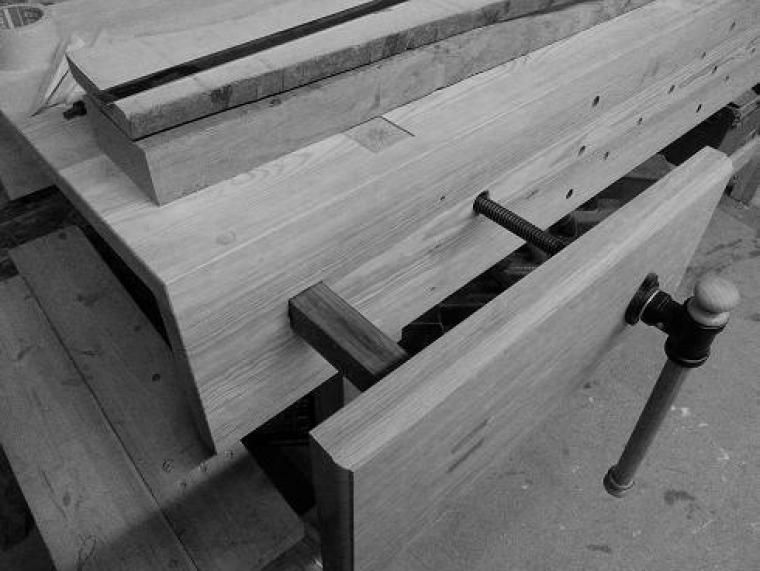
Then I chopped a hand cut twin mortice into the vice face and cut a twin tenon into the end of the runner. The twin tenon gives a really secure joint here. Once that was completed I glued and screwed a packer to the underside of the benchtop which made a level surface with the the top edge of the apron mortice. I then slid the runner in to the apron mortice. With the runner left 300mm longer it projected nicely from the apron allowing me to square it’s location. I then boxed it in by screwing some cheeks each side of the runner. A bottom section was then added into which I drilled some holes to allow any dust build up to find it’s way out (that’s the idea anyway).
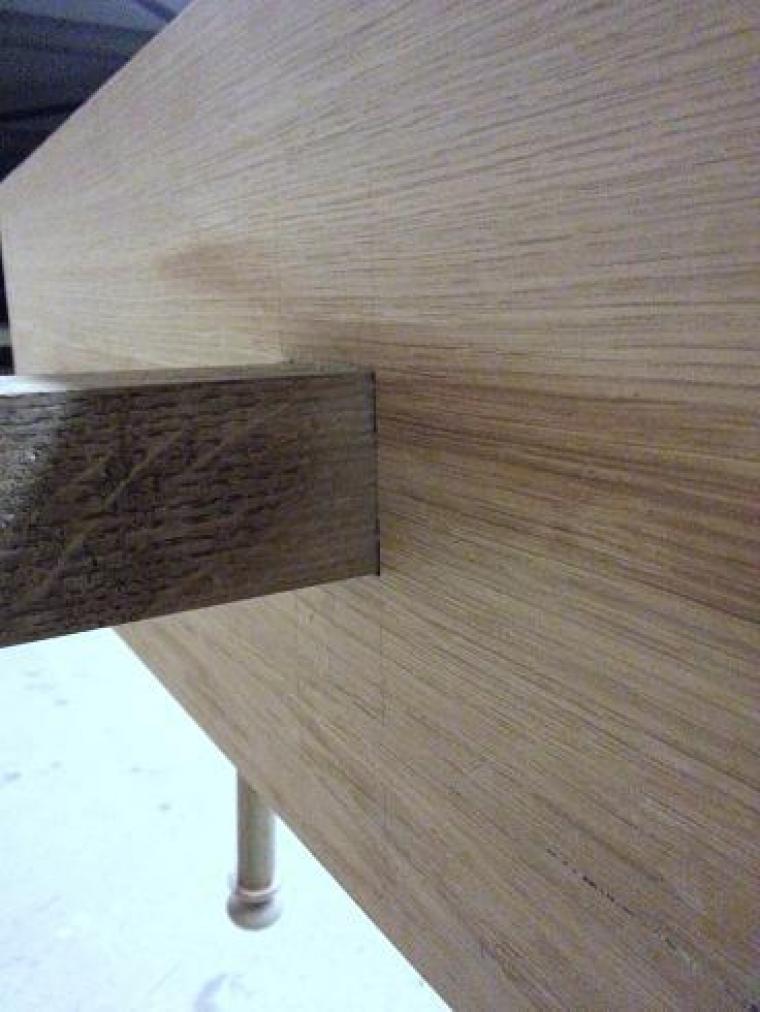
I then cut off the runner allowing it to project 10mm from the vice and slid it into it’s housing. I did this to make gluing the runner and cheek as easy as possible. I also screwed on the vice screw to aid the cramping up. I applied the glue and slid it on tightening up the vice screw and using a variety of cramps to hold it a consistent 10mm of the apron and then drove in the wedges. Once the glue had set I cleaned up the joint, cut the end off the runner to allow the vice to full close and applied a coat of furniture wax to the runner to aid smooth running. Vice done!