Live Edge Table - How We Made it

It all begins with the wood! Dining tables have evolved into typical sizes that suit modern needs. I'm not ashamed to say I refer to "Illustrated Cabinetmaking" by Bill Hylton when it comes to working basic sizing. It's a great book that gives you that brass tacks information that you really need.
With sizes in hand, I know what I'm aiming for and I try to see if the wood will allow as close to the ideal as possible. With this project I couldn't screw up, not easy when you're more than capable of doing so. A client hands over their lot of timber for the job, a unique batch felled on their land, it's not as if I can ask for more! Although this table creates the look of one big slab, it's made up from three sections. A square edge centre section with two wayney edge boards on each side. Our heavy duty machines make light work of this process.
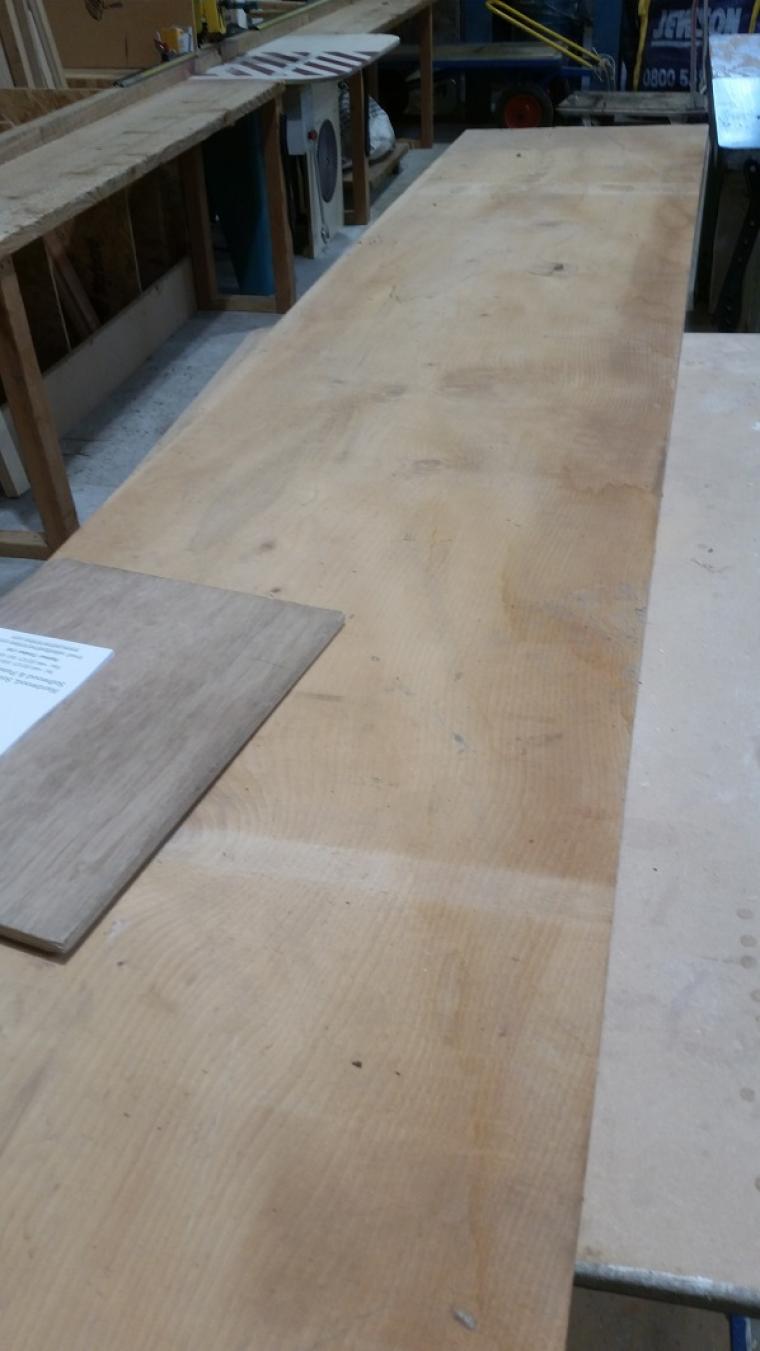
If you take a look on the photo of the three boards, I've really tried hard to get the grain to compliment where the edge join happens. I was never going to get a perfect match, but it's essential not to be lazy and get something that's sympathetic. Our planing machine can cope with wood up to 500mm (20") wide and made light work of planing the boards square and true.
The edges of the boards were made good with a comination of drawknife, spokeshave and abrasives. The trick here is to maintain the flow of the wayney edge. Some timbers allow you maintain the bark, however on this occasion the bark and sapwood were so soft I had to trim them back to a level that was acceptable.


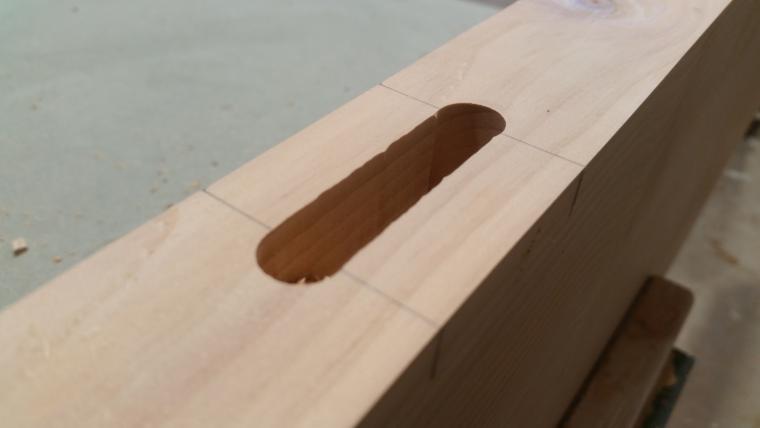
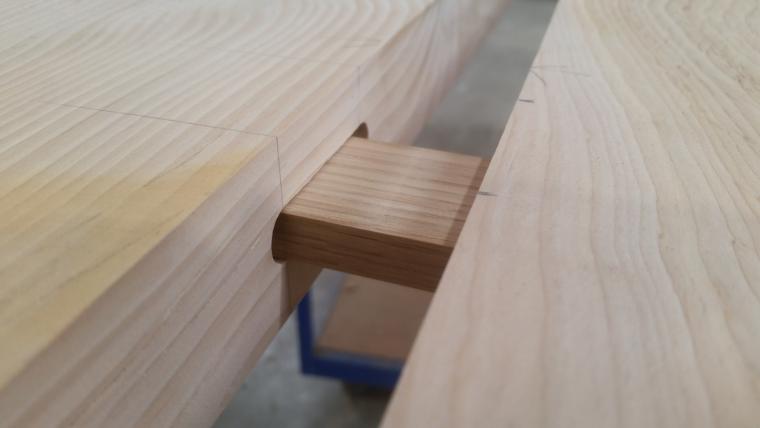
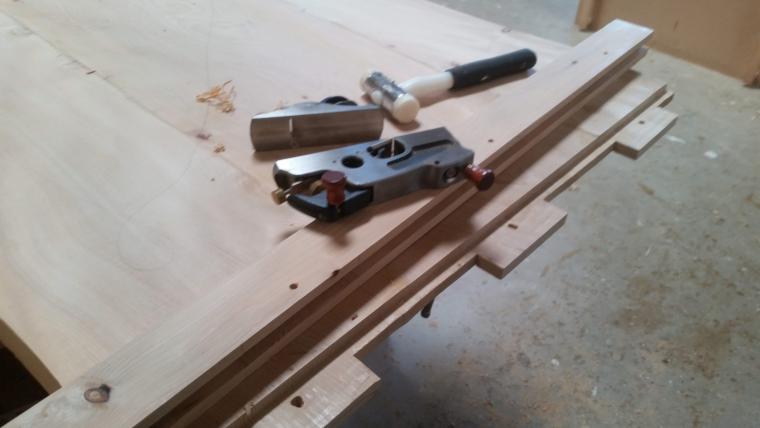
To make a strong joint between the edges of the boards I went one step further than the typical glued edge joint. I added some floating tenons to create extra strength and location. These days, floating tennons are often made by a special machine made by Festool called a "Domino". The Festool is a fine tool and we'd love to own one, but we just don't need it enough just yet. You can get the same results using a router, drill or chopping by hand. Here I used an electric router. The top was then glued and clamped and allowed to dry overnight.
To help keep the top flat and create some interesting detail we added breadboard ends. These are a series of tennons that are secured with oak pegs. Only the centre tennon is glued. This allows the top to expand and contract without the risk of the top splitting. The table top is then cleaned up with a combination of hand planes and sanders.
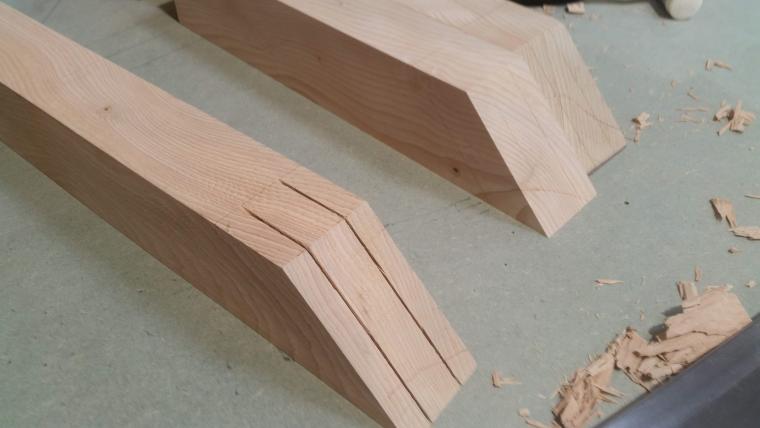
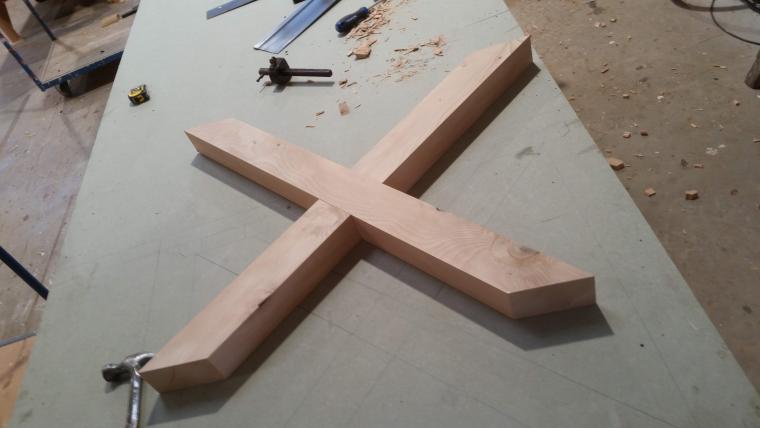
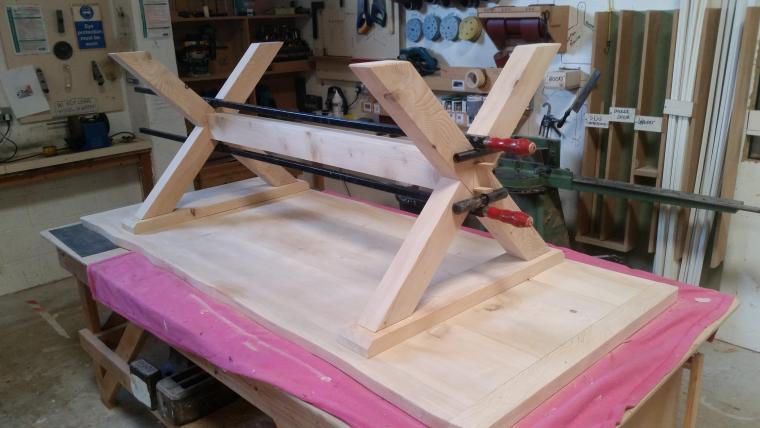
Making the base uses simple joinery. The two X sections were made with a cross halving and at the top two tennons ruth through a rail that connects the top parts of the X. Between the two X frames is a stretcher that is tennoned through the cross halving, when the time comes the jonint is glued and wedged. If a "knock down" design is required, tusk tennons can also be used. The supporting framework is then fixed to the underside of the table using elongated screw holes to allow for seasonal movement.
We provided the table raw on this occasion but a finish we've had success with is Hardwax oil made by the likes of Fiddes or Osmo Poly X oil.