Sharpening a Handplane
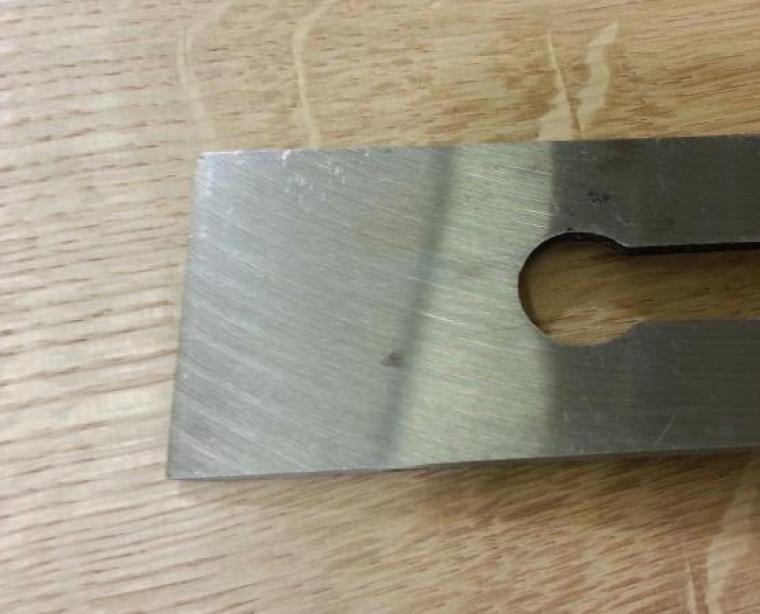
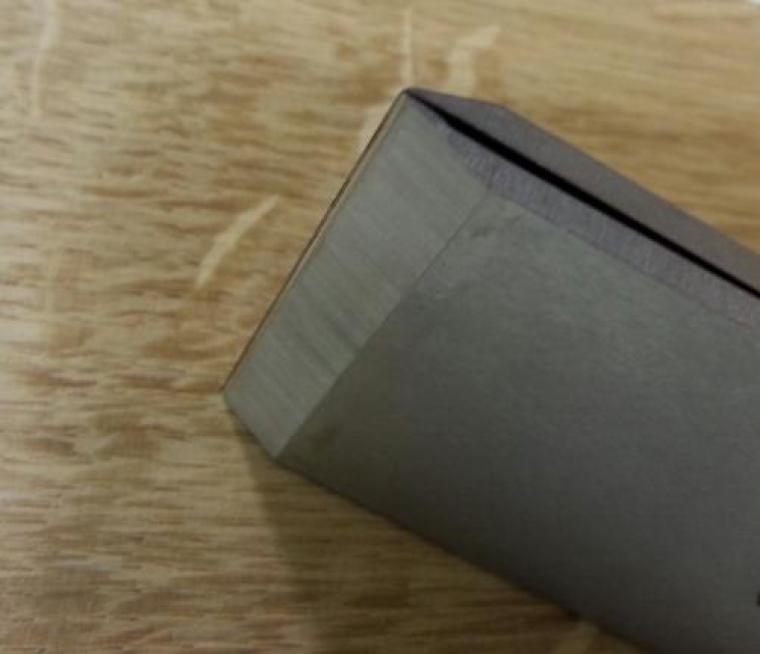
Sharpening a handplane is very similar to sharpening a chisel. As with the article on sharpening chisels I will be demonstrating on the India combination stone. The video above has a good demonstration of what's required and hopefully the addition of these photos and notes will bring further clarity to the process. First off remove the lever cap from the plane, carefully remove the blade and then remove the cap iron/chipbreaker from the blade. The first job will be to work on the back of the blade. If the plane is new to you a little work will be required. The extent of this work will depend on the quality of the blade, if buying new, or how it has been cared for if buying secondhand. The photo below shows a cheap plane blade that illustrates very well why we need to work the back. It is covered is machine marks. These marks will limit how sharp we can make the blade, we need to remove these marks and replace them surface which is of the same quality as the edge we hone on the front.
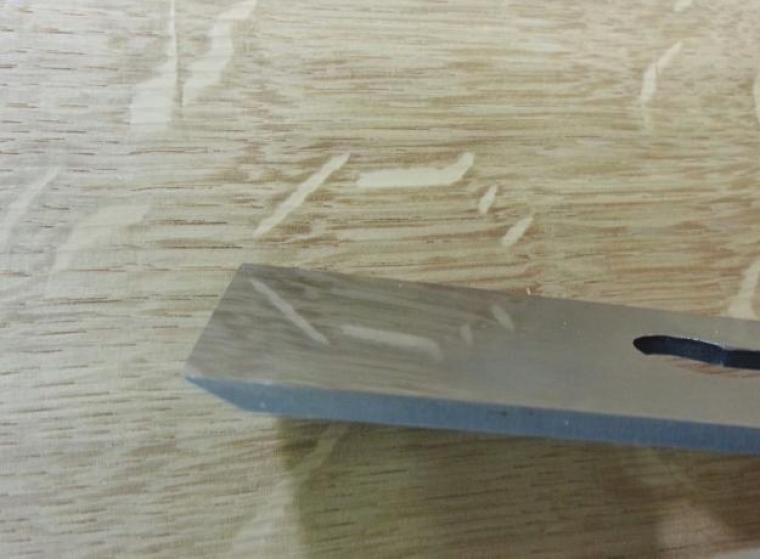
To do this lower the blade to the stone heel first and work all over the face of the stone. Check after a minute or so to review progress, keep working the blade until the marks behind the cutting edge are gone. Once they are add some autosol to the strop and refine the finish. The photo below show the quality of the finish I'm looking for.
Once the work on the back is complete you will not need to spend the same time on it again. Just removing the burr and finishing on the strop will be enough to maintain the back. The next step is to hone the bevel. As with chisels it is usual for plane blades to be supplied with a 25deg primary bevel. This angle is too shallow for normal work so we will need to add a secondary bevel of around 30deg.
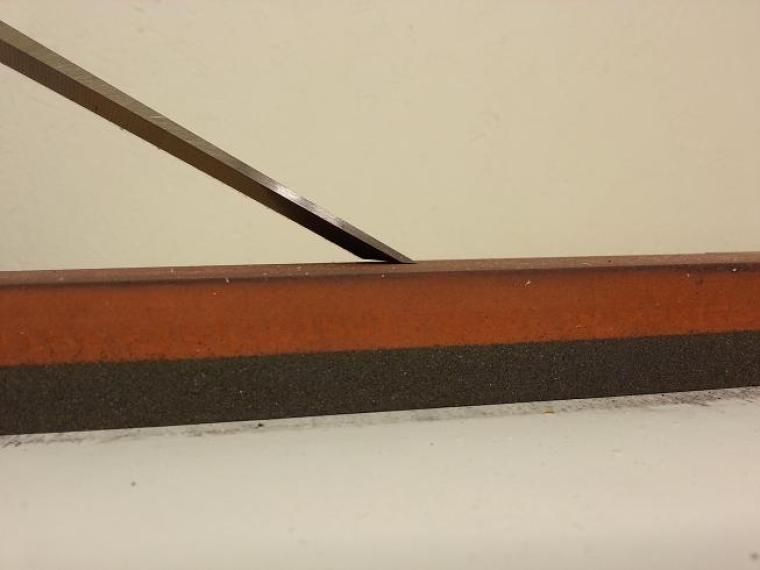
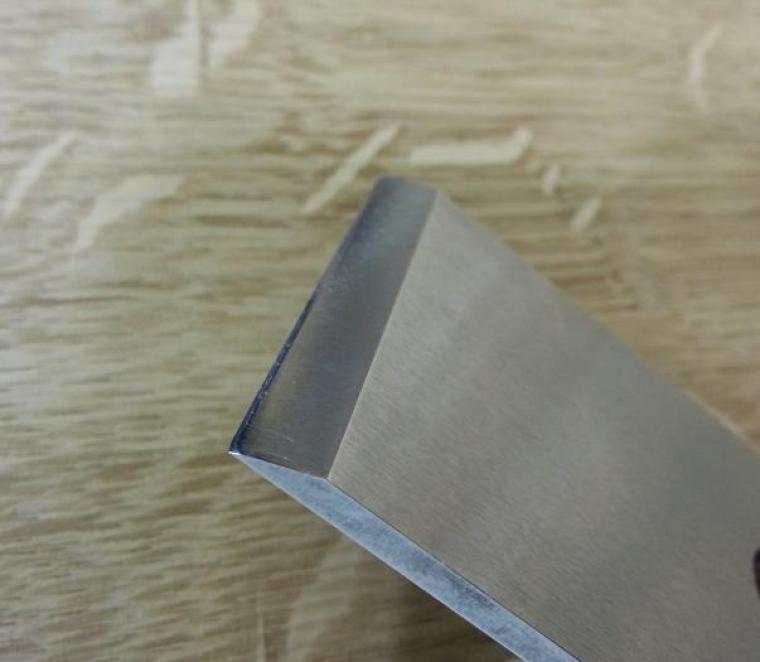
I prefer to do this freehand but a honing guide is also very good for this process too. To hone this angle bring the ground bevel to the stone heel first and then lift another 5deg or so and work the front edge. We also need to break the corners of the blade so the plane does not leave track marks on the wood. I like to do this when I draw the blade backwards/towards me as I find I have more control over the process. Once a few passes have been made remove the blade from the stone and feel the back of the blade, you should be able to feel a small burr along the whole width of the blade, if not hone some more. Once the burr is there turn the blade over and lightly work the back to remove the burr, this will turn the burr over to the front so lightly hone the bevel again, then onto it's back once more. Now finish the edge on the strop as shown in the video. The image below show what a the secondary honed bevel looks like.
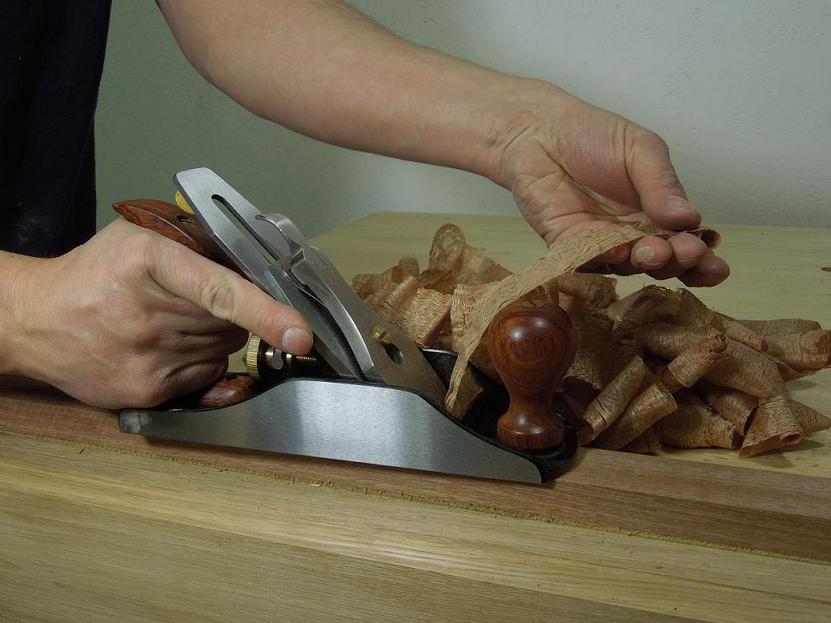
Put the plane back together and set the cap iron about 1mm away from the cutting edge as shown below which will be great for normal work. In future posts I will take a look at moving the cap iron closer to the cutting edge for a very refined surface finish.
Then it's time to test! Grab a piece of wood and hopefully you will have some great results.

As the blade becomes dull over time just refresh this small secondary bevel with a light honing and stropping. When the secondary bevel get's big (say around a third of the primary bevel) regrind the 25deg primary bevel. If you don't yet have access to a grinder the grey coarse side of the India stone and a honing guide can be used to reestablish the 25deg. Don't grind the secondary bevel away, leave a hint of it and then simply go back to light honing and stropping.
Enjoy the planning!